Swing Tutorial - 01 - Creating a Simple Frame of Window.
This tutorial is simple and will teach you how to create a simple Window Frame in Java using Swings.
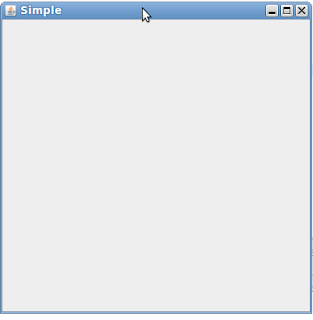
Final output will look like this:
 Follow the steps:
1. Open any Java IDE such as Eclipse or Netbeans.
2. Create a New Project and name it anything such as:
"Swing Tutorials"
or
"Swing Practice"
or
any name that you like to give it.
3. Create a Class in the default Package of the Project that you created and name it
"FrameTutorials"
A class will be automatically created which will have some boilerplate code that you write when you create a class in Java. It will look like this:
=============================================
public class FrameTutorials {
}
=============================================

Final output will look like this:

1. Open any Java IDE such as Eclipse or Netbeans.
2. Create a New Project and name it anything such as:
"Swing Tutorials"
or
"Swing Practice"
or
any name that you like to give it.
3. Create a Class in the default Package of the Project that you created and name it
"FrameTutorials"
A class will be automatically created which will have some boilerplate code that you write when you create a class in Java. It will look like this:
=============================================
public class FrameTutorials {
}
=============================================
4. Now write the following code in this class as it is without changing any variable name. But please do not copy paste it. By copy-pasting you will not learn anything.
=============================================
import javax.swing.JFrame;
public class FrameTutorials extends JFrame {
public FrameTutorials()
{
super("Simple");
}
public static void main(String[] args) {
FrameTutorials ft = new FrameTutorials();
ft.setDefaultCloseOperation(JFrame.EXIT_ON_CLOSE);
ft.setSize(400,400);
ft.setVisible(true);
}
}
=============================================
Your final file should look like this in Eclipse IDE:

5. Now click on the run button in the eclipse which looks like a Green Play button  .
.
Your Frame will open as shown in the first picture.
.Your Frame will open as shown in the first picture.
Now you have written all the code. Ran your first Java Swings program successfully but you still do not know how it works ? What all this code is actually doing ?
I will explain each line of it now below. So be attentive.
--> import javax.swing.JFrame;
This line imports the "JFrame" class from the swings package.
This class actually helps us to create a simple Window Frame and have all the basic functionality to set the size of the window, to set its visibility, to set its position on your screen and a lot more.
So how much you want to ignore this statement, you cannot. Be careful and always import "JFrame" class and "javax.swing" package.
--> public class FrameTutorials extends JFrame
Now the next statement is a simple class declaration. We have named our class "FrameTutorials" and have made it public, so the name of the file in which you are writing this class should also be the same as the class name.
One extra feature here is that this class is extending "JFrame" class that we imported earlier and is now a subclass of it. Now "FrameTutorials" class includes all the basic functionality of the "JFrame" class which we will discuss a little later in this tutorial.
Note ! Do not forget to extends "JFrame" .
--> public FrameTutorials()
{
super("Simple");
}
Now this is a little longer code snippet. But it is quite a simple one. In Java you have already learnt to create constructors. They initialize stuff(variable). So we created a Constructor of "FrameTutorials" class and called the super constructor in it. Now this super constructor will be of "JFrame" class that we extended in this class. It will call the super class constructor and initialized all the basic values required from "JFrame" class.
The parameter which we have passed while calling the super constructor actually will become the title of the window that will open. This parameter is optional.
Right now we just have to call the super constructor and this should be the first statement in the class constructor.
--> public static void main(String[] args) {
FrameTutorials ft = new FrameTutorials();
ft.setDefaultCloseOperation(JFrame.EXIT_ON_CLOSE);
ft.setSize(400,400);
ft.setVisible(true);
}
OOPS! this is again a long code snippet. Yeah I know. I will explain it line by line.
public static void main(String[] args)
This line as in all java programs create a main function from where the execution of the programs starts.
FrameTutorials ft = new FrameTutorials();
This line creates a object of "FrameTutorials" class and initialize it.
ft.setDefaultCloseOperation(JFrame.EXIT_ON_CLOSE);
Now this one might be a little confusion for you. Nopes it isn't.
Basically what this line is doing is that it is calling a function from the "JFrame" class through the object of "FrameTutorials" class because it is a subclass of "JFrame" class.
The operation performed by this function basically is it closes the Java program when we hit the cross button on the top right of the window that appears. Even if you do not write this statement the window will close but it will still be occupying memory in the back and that's a bad practice in programming.
So please add this statement.
The parameter in the paranthesis is actually a constant value from "JFrame" class which is unique to perform this close operation.
ft.setSize(400,400);
This statement is quite self explanatory. But still I should tell you. What it does is, it sets the size of the window that will appear on screen in pixels. First parameter is width and second parameter is height.
ft.setVisible(true);
This statement sets the visibility of the window to be true. If you do not write this statement or instead of true you write false window will appear but it will be invisible.
This is the end of the first tutorial. Keep learning and Keep enjoying. :-)
Happy Coding


Nice tutorial .. I would like to see more such tutorials soon ..
ReplyDeleteVery good! In the next lesson I'd like to see this JFrame Tutorial expanded to include JPanels with Layouts and JLabels.
ReplyDeleteYes sir I have already made that tutorial. See the second tutorial also sir.
DeleteAnd thanks alot for your kind time to reply.